Cash Register Troubleshooting: Find the Fault Before Replacing Parts
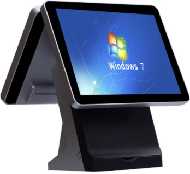
A counter-side diagnostic sequence for power, receipt printing, scanners and cash drawers, with safe stopping points and a useful support handover.
A failed checkout station does not necessarily mean the terminal has failed. A loose adapter, a printer error or an unavailable payment service can produce similar symptoms. Start by identifying the last successful action and the first action that failed; this narrows the problem without changing several settings at once.

Separate a power problem from an application problem
Check whether the terminal power indicator and display respond. Confirm the wall outlet and the connection at both ends of the approved adapter. Do not substitute a supply merely because its plug fits: voltage, polarity and current rating must match. If there is a burning smell, liquid ingress or damaged insulation, disconnect the equipment and arrange qualified service.
Follow the transaction through its peripherals
- Printer: check paper orientation, cover closure and status lights, then run the manufacturer's self-test independently of the POS application.
- Scanner: test a known readable barcode in the approved test utility. A successful decode does not prove the application has mapped the code correctly.
- Cash drawer: verify the configured trigger device and cable type. A drawer connector is not an Ethernet port.
- Payment device: check the transaction status with the payment provider before retrying an uncertain payment.
Escalate with evidence
Record the terminal model, software version, time, visible error and tests already completed. Preserve logs without including card data or customer credentials. Change one variable at a time, and confirm the complete sale, receipt and reconciliation workflow after recovery rather than stopping when the screen turns on.